Category: Lesson planning

  • 11th lesson for 2020: Collaborative storytelling

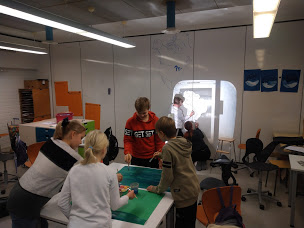
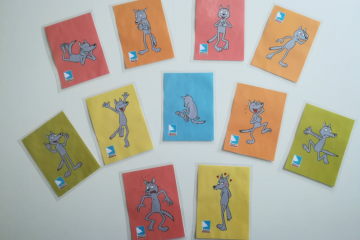
    Author: María Carrasco Orozco (M.Ed) Working as a preschool teacher in Tiny Hands English Kindergarten

    This lesson is designed to improve students’ confidence when speaking in a new language, as well as to grow their vocabulary. 

    It is intended for children from 6 years old to the end of primary education (but with modifications it can be used with adults as well) and it all depends on their language capabilities at the moment. I have done this lesson with my students in class, but now I bring an online version that can be carried out during distance learning and works as well.

    General learning objectives
    • Practice and grow vocabulary 
    • Review grammar structures 
    • Get confident using the language 
    • Foster creativity
    Materials

    The original material is called story cubes, but for the sake of the distance learning we will have to use an online resource. The teacher can create their own online dice with specific vocabulary or this type of resources can be used instead, with fixed vocabulary:
    https://scratch.mit.edu/projects/158896002/

    *Tip: If the learners are old enough, you can create a project around it and ask them to create their own story cubes online resource, using the platform Scratch.

    Grouping and Warm Up: 

    Method: Three Things

    The whole group can take part in this activity together. It is thought of as a warm up to activate learners’ vocabulary.

    It consists of asking students to think of three things related to a topic. The question could be: Tell three things that you love about summer, three Christmas things, three red objects, three fruits that come from a tree, etc. 

    If the learners are advanced enough you can group them and ask them to think of the questions by themselves and ask them to each other.

    Groups: Three or four per group

    You can use the affordances of the software that you’re using to reach your students or in the case of a lack of grouping options you could have the whole class participate, although it might be more challenging for the learners to keep their attention.

    Story Time!:

    Onced decided the groups it is time to play. 

    Image 1: This is how the software looks after pressing Go!

    Version 1: For beginners.

    One student shares their screen and clicks on “Go!” to roll the dice.

    That person has to start to tell a story using one of the images from the dice. Ex. Once upon a time there was a monkey. His name was Joey and he lived in the rainforest. The next person of the group will have to continue the story using another image from the dice, ex. One day, Joey saw a print of the ground that was new to him, it didn’t resemble any other animal footprint. Then the next member of the group will continue and so forth until they have used all the images and the story is finished.

    Version 2: For more advanced learners. 

    This time every student will have to tell the whole story by themselves, screens can be shared to show the images to all the rest. This is a more complex way since the learner has to come up with a whole story by themselves. 

    *Tip: It might be a good idea to work beforehand on connectors, such as then, after that, however, because, finally, etc.

    Enjoy! 

  • 10th lesson for 2020: Chinese language (distance teaching) lesson as second mother tongue for 10-12 years old students

    10th lesson for 2020: Chinese language (distance teaching) lesson as second mother tongue for 10-12 years old students

    Author: Gracie Meng-Pitkänen, worked as a Chinese teacher in Finland and China

    I have used the building blocks and methods presented in LessonApp in the following lesson planning. The methods in the app are very versatile which offer a lot of options to choose. My class is consisted of children with different ages but with similar level of Chinese language skills. They attended Chinese lessons outside their normal school time. Having interesting and engaging lessons in relaxing atmosphere is very crucial. I found that the methods in LessonApp used commonly by Finnish teachers are very student-centred and therefore appealing for students.
    Finnish teachers’ pedagogical skills are often mentioned in the Finnish education successful stories. Many educators from other countries, like me, should learn from.

    Learning objectives:

    • Learn to pronounce and recognise new characters
    • Make phases and sentences with new characters
    • Communicate freely with new characters and phases in real life situation

    Group size: 7
    Length of class: 45 minutes

    1. Warm-up (2 mins)

    Method: Relaxation
    A brief, relaxing, and simple way to start the lesson with a tranquil atmosphere. It helps children to concentrate and relax.

    The children close eyes. Play Chinese relaxing music to them. Children touch themselves lightly with their favourite soft toys.

    2. Orientation/Pre-existing knowledge (10 minutes)

    Method: Read
    Reading a chapter from the textbook or other written material is a good way to get familiar to new knowledge.

    Tell the students to read a short paragraph which is part of the article we are going to learn, and the new characters (with Pingyin) can be spotted when reading.

    3. New knowledge acquisition (15 minutes)

    Method: Drama
    Drama is an appealing way to make children interested in the lesson’s topic and activate them to learn.

    The part was carried out in the following steps:
    1) watch a recorded play based on the article a few times
    2) play and pause before the new characters/phases/sentences, then students can try to continue the play
    3) students try to act the whole play in different roles with my help

    4. Practicing (15 minutes)

    Method: Collaborative grid
    Collaborative grid is a cooperative method that improves students’ communication and interaction skills.

    All students write down the new characters and phases on the cards. One student puts the cards in certain order on the grid and explains how he/she has arranged them, and the others try to copy the order by listening to the instructions. Students can challenge themselves by explaining the cards in different ways.

    5. Reflections (3 minutes)

    Method: Buzz groups
    The method is used for reflecting upon what has been learned.

    Ask students question related to the article we learned. Students discuss among themselves. After a while, students share their thoughts or ask me if they have further questions.

  • 9th lesson for 2020: Math for 8th graders, Introduction to Percentages

    9th lesson for 2020: Math for 8th graders, Introduction to Percentages

    Author: Meri Ahonen, LessonApp co-founder and math, chemistry and physics teacher in lower secondary school, Nokia, Finland.

    This lesson is an introduction about ‘percents’. Students get acquainted with percents during primary school but of course we will recall the basics at 8th grade before starting to solve more difficult problems.

    At first I will explain a couple of principles of my distance teaching this Spring:

    • I used mainly Google Meet and GSuite (Classroom, Forms, Docs, Sheets….) for distance teaching. I shared documents, instructions, videos, exercises, etc. in Google classroom group. Students were familiar with it before distance teaching.
    • My groups had weekly goals. Students got the amount of stuff to do depending on how many lessons they had each week. They could choose when they did it and reported in their own learning diary (when, what, was it easy/ok/hard, any questions…).
    • Mathematic groups had compulsory online meetings at the start of every lesson. We continued using students’ normal schedule which was used before distance teaching.
    • In online meetings I presented theory and/or showed examples. After the shared start, student get to choose: either continue by themselves with the exercises from Math book or stay online to practice together with more examples if they wished. No matter what choice they made, every one needed to write a brief report to his/her learning diary.
    • I stayed online during the whole lesson so students could ask for help. I shared materials and some videos to classroom to support learning by themselves.
    • At the start of distance teaching I tried to sharpen the idea that students are doing this for themselves, not for me.

    This time I only used one teaching method, the other block is about students choosing how to practice.

    Percents in groceries

    1. Search information (30 min)

    Students will look for percents written on everyday things: They try to find three different items from, for example, food, drink, cleanser, and electronics, and then check the item’s contents, news, internet, or sales packages. They take pictures of their findings and return them to Google classroom exercise.
    (15 min for searching and taking pictures and 15 min for returning them to Google classroom.)

    Percents in statistics, tax and shares.

    I collected students’ findings in a powerpoint and presented them later on, when we did a small project about percents in advertising.

    2. Choose a working method. (30 min)

    Students can come to online meet to listen theories and do exercises from Math book together or start learning by themselves and report to learning diary. They can come back to online meet whenever they need help.

    Students will choose exercices from Math book (in Finnish) using this table. Each row represents examples of daily amount of exercises. They can choose to do minimum (“minimi”) or a bit more from good (“hyvä”) and excellent (“erinomainen”) columns.

    At the end of each week I will check the learning diaries. I will comment how it is going on, answer questions, and give example answers; if there are no markings, I try to connect with the student and investigate what is going on.

  • 8th lesson for 2020: Social studies lesson for 9th graders (basic education) in distance teaching – Finnish parliament and legislation

    8th lesson for 2020: Social studies lesson for 9th graders (basic education) in distance teaching – Finnish parliament and legislation

    Author: Satu Herrala (M.A.) special education teacher in lower secondary school (grades 7-9), Takahuhti school, Tampere, Finland

    In February, before the Covid-19 pandemic reached Finland, my class of 9th graders made a field trip to the Parliament house in Helsinki. The hostess of our visit was a Finnish MP Hanna-Leena Mattila who told us about the work of an MP. The students also had a chance to ask questions that they had prepared at school.

    Back in school, we were supposed to study the process of legislation and the duties of the Parliament more closely. Then all of a sudden, the school was closed due to Covid-19 and we moved to distance learning. That literally happened overnight. We started using Microsoft Teams software tool and continued studying online. In social studies, the shift to distance learning was relatively easy. This is a description of our double lesson on the topic The duties of the Finnish Parliament.

    Warm-up

    In my class, we often use fixed groups, so we didn’t really have any grouping at the beginning of the lesson. If groups are created at the beginning of the lesson, you can easily use the grouping activities presented in LessonApp. To warm-up and to create a learning-friendly atmosphere we used a set of emojis, which I shared via Teams. The students picked an emoji which described their feelings and posted it in our WhatsApp group. The idea was to share the feelings of the day and about the topic.

    Orientation – learning teams + mind mapping

    To focus on the theme, the students first collected their pre-existing knowledge on the topic. In this case my students already had quite a lot to build on because of our visit to the Parliament.

    First, I asked the students to draw (using only one colour) a mind map of what they already knew and remembered about the Parliament. This was done in small groups in Teams. At the same time, we practised how to use the channels for group work in Teams. The map was then presented to the whole class in Teams.

    New knowledge acquisition – small group discussion

    The students worked in groups of three to learn new things about the Parliament. The groups got the same set of questions, which they answered using their study books and the internet. I shared the students some links to useful websites where they could find accurate and reliable information.

    The teacher and the assistant visited the channels and helped the groups and made sure that everybody was working. The groups had free hands to decide how they wanted to organize their work, but they had to have a plan for that.  

    Practising and activating – teaching discussion

    Based on the knowledge the groups had acquired, they now made questions to the other groups. In the discussion at the end of the class when the students linked their new knowledge to their prior knowledge and experiences, they came up with some new questions about the Parliament and the work of MPs. The students then decided to write down the questions and mail them to the MP we had met in the Parliament.

    Reflection

    At the end of the lesson, the students completed their mind maps (using a different colour) with new things they had learned during the double lesson.

    Bonus Block: Rehearsing

    Due to Codiv-19, the members of the Parliament decided to help the students in Finland and made a series of presentation videos about the Parliament (https://edustajalive.fi/). We watched the videos and rehearsed what we had learned.

  • 7th lesson for 2020: Three States of Water for fifth graders in classroom and distance teaching

    7th lesson for 2020: Three States of Water for fifth graders in classroom and distance teaching

    Author: Teemu Nieminen (M.Sc, M.Ed) Working as a class teacher at Kankaantaka primary school, Nokia

    The Three States of Water

    This lesson about these three stages of water has been designed for G5 students and will be delivered before the lesson about the water circle.

    I have delivered this lesson many times in classroom instruction. This time I have also reflected how it would be possible to run it remotely.

    Learning objectives:

    • Students will be able to name the three states of water and give examples of how does water change in state.
    • They will find some factors that affect the rate of evaporation.
    • They will be able to define the simple steps of the scientific method.
    • They will use the scientific method to create an experiment in their daily life.
    • They will learn to formulate a hypothesis for each question.

    Materials (at school or at home):

    • Ice cubes
    • Water
    • Containers / glasses
    • Coffee machine or electric kettle
    • (different substances for experiments)

    Warm up: Hangman (10 minutes)

    The students are used to flipped learning and before the lesson they have read about this topic from their study books and watched one video about the three states of water. We will begin this lesson by revising the terminology of this topic by playing hangman all together. Good words for this are liquid, solid, gas, freezing, melting, condensation, vapour, boiling, evaporation.

    This warm up -part is actually quite easy to run also remotely. We can organize a meeting using Meet or Teams or similar application and then play Hangman by using either a camera and a real whiteboard or a virtual whiteboard.

    Grouping:

    Grouping is always essential if we want to get the students to work as efficient as possible. When doing experiments, I have many possibilities for forming the groups. Because I am a class-teacher, I see my students many lessons every day and know them and their strengths and weaknesses quite well.

    I will use random groups this time. For this I have plastic coins of different colours. I will totally put 25 coins (five of each colour, to a hat and every student will then pick up one of these coins. The groups will be then formed based on these colours and each group should have all five different colours. These “Colourful groups” will be used during our experiments. For the last part of this lesson, we will use different “single colour” -groups.

    During distance teaching and learning it is even more important for students to feel being a member of a group and for that reason I try to utilize different teams and groups whenever it is possible. But this time I prefer not to use groups because these scientific experiments will be easier to conduct individually at home.

    Science experiment (30 minutes):

    This part of the lesson will start with the experiment that we are all doing together. This experiment needs more time and probably we will not get it done during this lesson, but we will use this to practise the basics of conducting an experiment and to formulate a hypothesis. This first experiment could be about melting, and the question might be “Which one of these two containers has more liquid water?” The idea is to have two similar containers.  The other container will be filled with ice cubes and the other will have liquid water for a half of the container.

    After this first experiment the students will work in groups and conduct 2-3 more experiments. These experiments will always start by formulating the hypothesis and then following by the simple steps of the scientific method. These experiments will introduce all the three states of water by demonstrating some of the following: freezing, condensation, boiling, evaporation and some factors that affect the rate of evaporation.

    How about these experiments when working virtually from home? As I mentioned earlier, I would not use any groups, but every student will conduct them individually. The teacher will help each student by demonstrating all experiments and giving instructions slowly. Recording a video is one way to make it easier for students to follow. When watching a video, they can easily stop and repeat phases as many times they need.

    At home the students don’t probably have similar containers for experiments than the school has. A teacher has to advice students to use similar drinking glasses for their experiments. These could be for instance red wine- or white wine glasses.

    Reflection: 3, 2, 1 in groups (5+ minutes)

    For the last part of this lesson I will form new groups based on the coloured plastic coins. In these “single colour” groups the students will shortly discuss and write down three things they have learned during the lesson, two things they found interesting and would like to learn more about. Finally, students write down one question they would like to ask about this topic.

    Reflection is a key element when working remotely. One way to organize a group meeting is to open a different live meeting for every group. By doing this, a teacher can easily run many different meetings at the same time. This is possible, but for your own comfort and for protecting your own ears, I suggest you mute your speakers and headphones and open a fifth meeting using different device just for questions and answers.

  • LessonApp brings teachers from different countries together

    LessonApp brings teachers from different countries together

    LessonApp provides a great platform for teachers around the world to exchange ideas about teaching different topics.

    This time we would like you to meet Ms Stephanie Saliba, a Maltese primary teacher from Mater Boni Consilii St Joseph School Paola. She has used LessonApp for planning her lessons. In addition, she has utilized Seppo, a Finnish gamification tool, for making her lessons more engaging. We asked her, how did she get interested in Finnish pedagogical tools like LessonApp and Seppo.

    As a school we have participated in various talks about Finnish pedagogy administered by Learning Scoop and they have been very interesting. I was also given the opportunity to attend the basic study tour in Finland and it was such an enriching educational experience for me. I learnt about LessonApp and Seppo during both talks held in Malta and in Finland.

    How do like using LessonApp?

    LessonApp is a tool which helps educators like myself plan lessons interactively from the very beginning of the lesson till the very end including activities depending on the level of the students and the topic.

    What do you find best in using Seppo?

    Seppo is a gamification tool which could be used for any subject and age. It encourages collaboration between students, it encourages students to move about and learn in a fun and interactive way. Since my students are young, my students also learn how to use a digital device and improve literacy skills.

    Is there something you would like to wish for the other teachers around the world during this pandemic?

    We are all in the same situation together. There are many ways of reaching out to your students so do not be overwhelmed with so many new digital ideas, do what you feel comfortable doing making sure that you show them that you are there for them and always encourage them to stay safe and keep well. 

    Thank you Stephanie for your wise and encouraging words!

    Stephanie visiting Tampere, Finland, during Learning Scoop’s study tour
  • 6th lesson for 2020: Mathematics lesson for 8th graders: Direct and inverse proportions

    6th lesson for 2020: Mathematics lesson for 8th graders: Direct and inverse proportions

    Author: Tommi Roininen (M.Sc.), Assistant principal, Hakkari lower secondary school (grades 7–9), Lempäälä, Finland

    This lesson was held after the schools moved to distance teaching in Finland. To be honest, it really has been amazing to see how quickly and smoothly our school system has adapted to the current situation. Luckily my students were already familiar with ‘Flipped learning’ pedagogy (please find out more information in LessonApp), using their smartphones and other technology during the lessons. I also believe many of the building blocks of LessonApp can be adapted to distance learning if we just use our imagination bit more.

    Basically, I’m using flipped learning pedagogy, so before this lesson the students have watched the teaching video on Google Classroom. The teaching videos are mainly made by me and locate on YouTube in my open channel.

    During the distance learning period the lessons start by meeting together in my Google Meet room. I’m also using other G-Suite applications in my lessons but of course the same tricks can be implemented with other software tools as well.

    This lesson plan is for mathematics, but basically the same plan will suit well for many other subjects and topics.

    1. Orientation – Lines (Google Classroom – Google Slides)

    For this part of the lesson I have prepared a slide that has a line with two scales – the upper scale has numbers from 0 to 4 and the lower one with only words “NO” and “YES”. I also have shared the file with all the students in the group for cooperation purpose (allow students to edit the file).

    At first, I will ask the students to go to our Google Classroom and find the first task including this shared slide. The students will open it and write their names in a new textbox so that they will be able to move it around the slide. After that I’ll ask one or two control questions e.g. how they feel today. The students should move their names somewhere in the slide based on their feeling today when 0 is lousy and 4 is absolutely terrific. After confirming that the idea is clear I start asking some questions about the homework and topic. Now the students will vote how clear the particular detail is or how difficult they understand certain things in homework and topic.

    By asking the right questions teachers would have possibility to spot the needs for differentiation, support, other pedagogical and didactical details around the topic.

    2. New knowledge acquisition – Google Forms Quiz

    For this part I have prepared a Google Forms Quiz including 4-6 easy and basic level exercises. The students’ task is to complete a short Google Forms Quiz independently and get an individual score for next part of the lesson. The exercises include multiple choises and a couple of open questions to make sure that the students are not just guessing the results.

    After completing the quiz, they will get the points. Based on the points the students will be given the recommended exercises from the math book. The students with 0-3 points are going to stay active at Google Meet with me and receive some extra support by going through some really basic exercises step by step. The students with 4-7 points will be assigned to do some basic-advanced exercises and the students with 8-10 points can start with more challenging exercises.

    Sometimes I have the special education teacher or the school assistant with me during the lesson. They can also help the low level group with the basic exercises while I can help the other groups and make sure their exercises to be done at right levels.

    3. Practising with the optimal level exercises based on the quiz points.

    4. Reflection – Lines (Google Classroom – Google Slides)

    The lesson will end the same way as it started – by collecting some feelings and opinions about the way of working, the level of the exercises, the adequacy of support, their own productivity and attitudes. Remember to listen to the students after every voting and ask for more detailed information so that the next lesson could serve the learning better.

  • 5th lesson for 2020: Information Hunting (pre-existing, new and fake information) Topic: What is a corona virus? (6th grade)

    5th lesson for 2020: Information Hunting (pre-existing, new and fake information) Topic: What is a corona virus? (6th grade)

    Author: Kaisa Tuomarla, Class teacher, Basic Education

    This lesson type can be useful for many different subjects and topics: e.g. biology (for example human / growing up, nature / animals / certain animal) or geography (continents, particular country). In my case, I had an extra lesson to give, and therefore I let the students to decide, what would they like to know more about. They chose corona virus, no surprise.

    This lesson was held before the schools were closed in Finland. Pupils were curious about corona virus, and everybody had heard a lot of different kind of information and rumours, so it was a good topic for the lesson. This lesson was planned by using LessonApp and it was carried out for sixth graders (12 years old) in March 2020.

    Warm up: Everyone with something…

    This is a method for grouping in the LessonApp and we used it´s variation. I told students to form groups of 2 persons by following the instructions. “Everyone in the group has to have something red”.  After everyone found a group, they had to make a new one group of three persons: everyone who has something else in common (little sister/brother or a pet). After that, we made again groups of three with the question: “Everyone with the same mobile phone?” Then groups of four by asking the colors of their socks. And again, with hair colors. If somebody didn´t find a suitable group, he/she just joined one. I made new groups 5 different times and eventually students were mixed more than just with their best friends. Then I asked them to sit down with their groups (number of persons in each group was four).  

    Orientation circle

    Every group sat down. They had a large piece of paper and everyone had a marker. 

    I asked, what would be the topic the students would like to know more about. It was early March in 2020, so of course everyone wanted to discuss about the corona virus. 

    I had my own piece of paper on chalkboard and started to ask subtitles from students. The students started to suggest them: Symptoms? What is corona? How to prevent it? What are the consequences, for humans / for economy? 

    My role was to guide gathering the subtitles and decide, if the subtitle was too close to some other subtitle that was already there.  Finally, we had 8 subtitles, which was a bit too much, less (6?) would be better. Students wrote the same subtitles I had on the chalkboard in their big papers (every group had one). Then everyone started to gather information they already had: what do we know about this subtitle? Have we ever heard anything? Can we guess something? If there were guesses or rumours, they marked it with a question mark. 

    Treasure hunt

    This is a variation of a workstation method, called a treasure hunt. Every group had their knowledge and guesses on their tables, and everyone had the same topic and the same subtitles. Now they decided, which one of them was going to hunt more information for subtitles 1 and 2, which one for 3 and 4 etc. Everyone stood up and went to read other groups’ papers, hunting new information for the subtitles they had just agreed. If they found new information, they “stole” it and added it in their own paper. Soon every paper had the same information. 

    Finally students went back to their own papers and started to discuss about their findings. What new information did they get? When the new treasures had been discussed, students started to check the guesses. Is this a fact or just a rumour? Students used their own mobile phones or class computer to check the facts. I had to help only with few guesses, and only about one guess we never found out, if it was a fact or fake information. 

    Reflection: Closing discussion

    This is a discussion lesson, where the students guide themselves and the discussions. Nevertheless it is good to have a closure together. It could be as simple as we did: 

    Every group told one thing that they knew themselves beforehand, one thing they “stole” from the others and one guess they checked to be a fact or as fake information.

    **

    This kind of lessons teach pupils not only new information about a topic they are interested in, but also information processing skills, critical thinking, media literacy, collaboration and social skills. Time well spent!

  • 4th lesson for 2020: What is sound? (Physics)

    4th lesson for 2020: What is sound? (Physics)

    Author: Meri Ahonen, LessonApp co-founder and math, chemistry and physics teacher in lower secondary school, Nokia, Finland.

    Learning physics helps us to understand the world around us. In Finnish curriculum, physics as its own subject starts in lower secondary school when students are 13 years old. Before that physical phenomena have been studied in environmental science, biology and geography lessons. During the grades 7-9 students will learn basics about sounds, lights, temperatures, mechanics, movement, interactions, energy, density, pressure, electricity and magnetism as well as what physics is all about as a branch of science. Students will do a lot of science experiments and learn how to measure, ask questions and research.

    This lesson was planned for 7th grades (13 years olds), who have just started to learn physics. Before this lesson, we have talked and experienced different kind of vibrations with pendulums, springs and simulations. Students have learned that there are longitudinal and transverse vibration, what features they have and how to identify them. Students also know what frequency means and how to calculate it. This lesson is all about making sounds and to understand that every sound needs a vibrator.

    1. Pair discussion (5 min)

    As a warm up, instruct students to talk with their neighbour about how could they produce sound. Give them couple of minutes and collect the ideas together afterwards.

    2. Science experiment (40 min)

    Science experiment: Making sounds
    (25-30min for students to experiment and 10-15 min for discussion about the results)

    Students will make sound with different items, observe and take notes what they see and hear. Students may work in pairs or small groups. I have a seating plan for students and each have a pair or a small group to work with every lesson. Give the items you have chosen to students and help them as little as possible. Let them try out different ways of producing sound by themselves . Here are four examples for the items and how to use them, if the students need help. Ask them questions to help them observe the phenomena. You can let the students try all items at once or walk them through one item at a time, depending on the calmness of the group

    1. Ruler: Put the ruler at the edge of the desk, couple of centimeters outside. Pluck the ruler with your fingers. Change the lenght which is outside the table. Observe. Touch the ruler to silence it, how does it feel? Take notes.
    2. Rubber band: Stretch the rubber band between your fingers. Make it tight or loose. Pluck it. Try rubber bands with different thickness. Observe and take notes.
    3. Test tubes: Take 3-4 same size test tubes and test tube rack. Fill the tubes with different amounts of water. Blow into the tubes. What is it that we hear? Water or air? Observe and take notes.
    4. Tuning fork: Hit the tuning fork lightly to the table and bring it near your ear. Hit a bit hardly. Silence it with your fingers. Observe and take notes.

    If the students know what frequence means, you can discuss, which item has the highest and which has the lowest frequence.

    After the experiment, discuss each of the items together. What observations did students have? What did they feel and hear? Show or steer the discussion to the “answers”, which you can read from the lesson plan in LessonApp.

    3. Teaching discussion (15 min)

    Theory from teacher: Hopefully students had the conclusion during the experiment, but clarify the theory at the end of the lesson: To produce sound we need something that vibrates.

    Discuss together, what vibrates in different musical instruments or sound makers?

    • Guitar (string), flute (air), drum (diaphgram)
    • Knocking on a door? (the door)
    • Whistling? (lips)
    • Singing or talking? (vocal cords)

    A bit more theory: Sound waves are longitudinal waves.
    –> Show a picture or simulation about the waves moving through the air if you can.
    (Talk more about longitudial and transverse wave motion before or after this lesson with older students)

    4. Extra

    If students were efficient and you have too much time left or for homework:

    Ask the students and depate over:
    1) Could you hear sounds in the space? (No, there is no air or other that could vibrate)
    2) Why can you see the light before you hear the sound in thunderstorm? (Light travels faster than sound, which leads the discussion to the next lesson, how fast does sound travel?)

  • 3rd lesson for 2020: Emotions with a gadget

    3rd lesson for 2020: Emotions with a gadget

    Author: Elena Chukhlantseva

    Emotional intelligence is a hot topic these days. It is commonly known that the emotional competence of a person develops throughout their life. Early years is a particularly crucial time for supporting the child in their emotional learning that is intricately interconnected with fast-developing cognitive, social and physical skills.

    It is a complex and challenging task for a young child to understand their own and others’ emotions and underlying feelings, to express their own emotional states as well as to regulate their own reactions and behavior. For strengthening and advancing various emotional skills the child needs to be at a certain age and level of development. Therefore, it is necessary to have a conscious and realistic approach to the adult’s expectations from each individual child. The adult working with the child needs to distinguish between what the child can already do by themselves, what the child can do if support is provided, and what is still beyond the child’s zone of proximal development.  

    Emotional learning progresses in a cumulative manner to a wider scope and degree of in-depth understanding of the realm of emotions. Teaching and learning emotional skills is a process that requires routine, consistency and persistence of effort. One aspect is a must to remember from the start: anything the child feels, in any way they react, the child needs to be understood, accepted and supported as they are.

    There are many ways to integrate the learning of emotional skills throughout the day as a part of any action from morning greeting to the afternoon outdoor time. I created my lesson ‘Emotions with a gadget’ for young children aged 4-to-6 years old with the help of LessonApp Premium. The aim of the lesson is to practice recognizing and understanding various emotions in a playful way. During the lesson, the children use a digital device (e.g. a tablet, iPad, video camera). 

    1. Warming up (5 min)

    Method used: Symbol work

    The objectives of this exercise are to introduce the topic of the lesson, to connect to each child’s world, to give the names to different emotions. 

    A teacher lays down several emotion cards for children to choose from. Alternatively, the children can draw a card that describes how they feel at the moment (this option may take extra time). Discuss in a group what makes them feel like that, what other situation may make a person feel the same way. Think together, for instance, what means to be empathic, how empathy connects to own feelings and how it helps others.

    2. Practicing (45 min)

    Method used: Role play, Multimodality

    The objectives of this part of the lesson are to help the children work out various situations involving emotions and to encourage expression through creative play. A mix of modalities like SoundSmart, WordSmart, PeopleSmart, Image Smart and BodySmart allows for engaging the children’s senses and multiple skills areas in a holistic way.

    1. Choose 2-4 stuffed toys or puppets for the role play. Prepare a digital device for video-recording.

    2. In a group, discuss and develop “non-happy ending” situations with different roles for the stuffed toy characters. The example situations can be a situation when somebody is left alone, while others play together; or somebody says something wrong and others start laughing at that character and so on. Decide on one situation that can be turned into a play with the toys or puppets.

    3. Prepare the children for the play. Ask them to set the stage for the play by using available toys and supplies (blocks, boxes, small word toys, etc.) as props. Decide together with the children on their tasks during the play and divide the children into small groups accordingly: the first group comes up with the appropriate sound background, the second group performs actions with the toys, the third group speaks for the roles of the toys, and the fourth group records the video of the play.

    4. Let the action take place.

    5. After the role play is finished, watch the video with the group and discuss e.g. how the characters may feel in the situation, why the situation has happened, how the situation may continue, how the situation affected other characters in the play, etc. The teacher makes sure that the children get their turn to participate in various tasks throughout the role play.

    6. Next, think of alternatives to how the situation could have been taken forth differently. Develop a different scenario for the situation with “a happy ending”. Make a new role play and record a video.

    7. (Optional extension)

    The aim of the extension is to move the action from the toy world into the children’s own world. Instead of acting out the situation with toys, the children can perform themselves. The video can be taken in one go or in parts. It can then be edited with any suitable application (e.g. MovieMaker). It is necessary to ask for the guardians’ permission to video record the children prior to the lesson.

    3. Reflection (5 min)

    Method used: Inside-outside circles

    The teacher asks the children to formulate in their minds two or three things they liked about the lesson the most. Inside-outside circles are formed. The teacher gives the children 10 seconds for each stop before the move to the next partner in the opposite circle.

    Videos as the result of the project work can be presented to e.g. another group of children, parents and so on.

    You can find this lesson plan in LessonApp.